


I’m back, or rather, I never left.

Where have the devblogs been?!
Month 1
I think it’s only natural to have the thought “Am I insane?” for pursuing a project like this, where I’m essentially rewriting an entire game engine. The first month of silence was spent toying around with Unreal Engine 5 trying to figure out if my efforts here are in vain. (They aren’t.)

No, I’m not moving to Unreal. It was fun to experiment with, but definitely felt like it would be dropping a turbocharged V12 into a classic car.
I’m nowhere near proficient enough with Unreal to get it going quickly, and Unreal is extremely heavy boasting a whopping 120MB empty project. Plus there are some technical requirements such as browser support (targeting WASM) that just aren’t there.
Overall, I think it’s an amazing engine that I will definitely be using in the future for other projects, just not for Rune Synergy.
What about the remaining months?
I spent them working on Rune Synergy! I just wasn’t blogging about it. There’s even ingame video now! (Finally)
Optimized model atlas
Previously there was an issue where the model atlas would render the same view of a model multiple times. This has since been solved by keying cached atlas slots with more specific information. Now we can appreciate retaining more space for other renderings.
The following screen:
Produces an atlas that looks like this:
You might notice there is way more rendered than actually shown. In the future I plan on clamping the render size to the largest viewport (512x334 in our case) to help save space.
Animated Models
If you look at the atlas above, you’ll see the fire rendering look a bit wonky. This is because I’ve decided that animated models will simply overwrite their previous rendering in the atlas. I tested other options such as pre-rendering every frame of an animation, but with larger or many animated models this ended up being unpredictable in if they could all be binpacked into a 4k texture.
ClientScript 1
If you’re familiar with the client you’ll know there is a super primitive scripting language hidden within, with a whopping 22 opcodes. It’s just a glorified arithmetic machine with a single accumulator, four operators (add, sub, div, mul), and a bunch of load instructions for different values in the client.
type ScriptOp uint8

const (
	ScriptReturn               ScriptOp = iota // [param1, [paramN...]]
	ScriptLoadSkillLevel                       // skill_id
	ScriptLoadSkillXPLevel                     // skill_id
	ScriptLoadSkillXP                          // skill_id
	ScriptLoadInvCount                         // inv_id, item_id
	ScriptLoadVarp                             // varp_id
	ScriptLoadSkillNextLevelXP                 // skill_id
	ScriptUnused                               // varp_id
	ScriptLoadCombatLevel                      //
	ScriptLoadTotalLevel                       //
	ScriptLoadInvContains                      // inv_id, item_id
	ScriptLoadRunEnergy                        //
	ScriptLoadRunWeight                        //
	ScriptLoadVarpBit                          // varp_id, bit_offset
	ScriptLoadVarbit                           // varbit_id
	ScriptSub                                  //
	ScriptDiv                                  //
	ScriptMul                                  //
	ScriptLoadPositionX                        //
	ScriptLoadPositionZ                        //
	ScriptLoad                                 // value
	ScriptAdd                                  //
)
It’s been fully wired up along with varps and varbits so interfaces should reflect their proper values now!
What is a varp or varbit?
Varp
Also known as VarPlayer, is a 32bit value tied to your character. RuneScape internally tracks variables of your character as an array of numbers, and transmits them to the client. On the client side they are only known by ID or Index, which is what ClientScript1 uses to obtain them.
Varbit
An n-bit value derived from an existing Varp. You can look at them as taking a slice of a Varp. They are essentially a space saving technique to allow multiple possible variables to be stored into a single Varp.
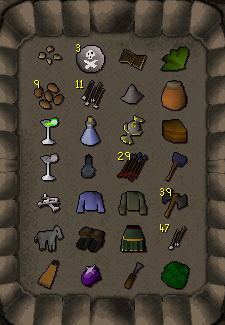
Inventories
At the moment I’m using a prerendered atlas. The client is still capable of rendering item icons on the fly, I just opted for the simplest solution for now.
(Preview images upscaled 4x using xBR)

Audio system
For our revision, 3171, you would typically rip a later revisions audio system out since it’s in the same language and meant for the same game. We don’t have that luxury, we have something better.
1 RuneScape builds are typically referred to by their build numbers. Learn moreWhile on the surface it seems no better than the standard solution, if you familiarize yourself with the features of faiface/beep you’ll notice that it’s possible to add pre and postprocessing to audio streams.
This type of behavior isn’t utilized in 317, but it will allow us to do some fancy things later on (if we want), like adding reverb to caves specifically for Effects and Ambience. This also means features like spatial sound effects are trivial panners and attenuations. I’ve even already implemented it! You can test out the 2D demo here. Make sure to select test-audio and use your WASD keys to move around.
Here is a diagram of the new audio engine:

No MIDI synth (For now)
I know, that means massive audio files. For now we’re sitting at about 2.2GB which isn’t ideal. Luckily with the new audio engine it should be trivial to play songs while they load.
The fact of the matter is: I couldn’t get things synthesizing as efficiently in WASM as I’d have liked. Originally I had gone with sinshu/go-meltysynth but realtime synthesis was eating up a chunk of my frametime budget. Perhaps later I’ll look into using a WebWorker to process synthesizing on a separate thread.
Here’s a sample:
harmony.ogg
I sourced them from https://archive.org/ who in turn sourced them from @OldScapeMusic who has a mega folder with more information on how they convert/encode them.
I’ll most likely revisit this, since eventually I’d like to incorporate a way for players to create music sheets ingame! For now I have to focus on the minimal viable product though.
Scene: Camera… Lights… Action!
But before we get started, you should know the jist of how the scene renders. I’ll only skim over the important details for now, as the scene rendering procedures warrant an entire blog post of their own.
Culling
Culling is just a fancy word for saying “skip rendering what is not visible.” There are three types of culling used in our engine. I’ll introduce them in the order they’re used.
- Back-face culling
- Frustum culling
- Occlusion culling
The occlusion link will be made when the Scene Rendering post is available.
Frustum culling
The frustum implementation deserves a bit of attention.
Internally there is actually a lookup table (LUT) which makes the time complexity of testing a point O(1). The drawback is that you must define the range and initialize the LUT on startup. Not so bad, right?
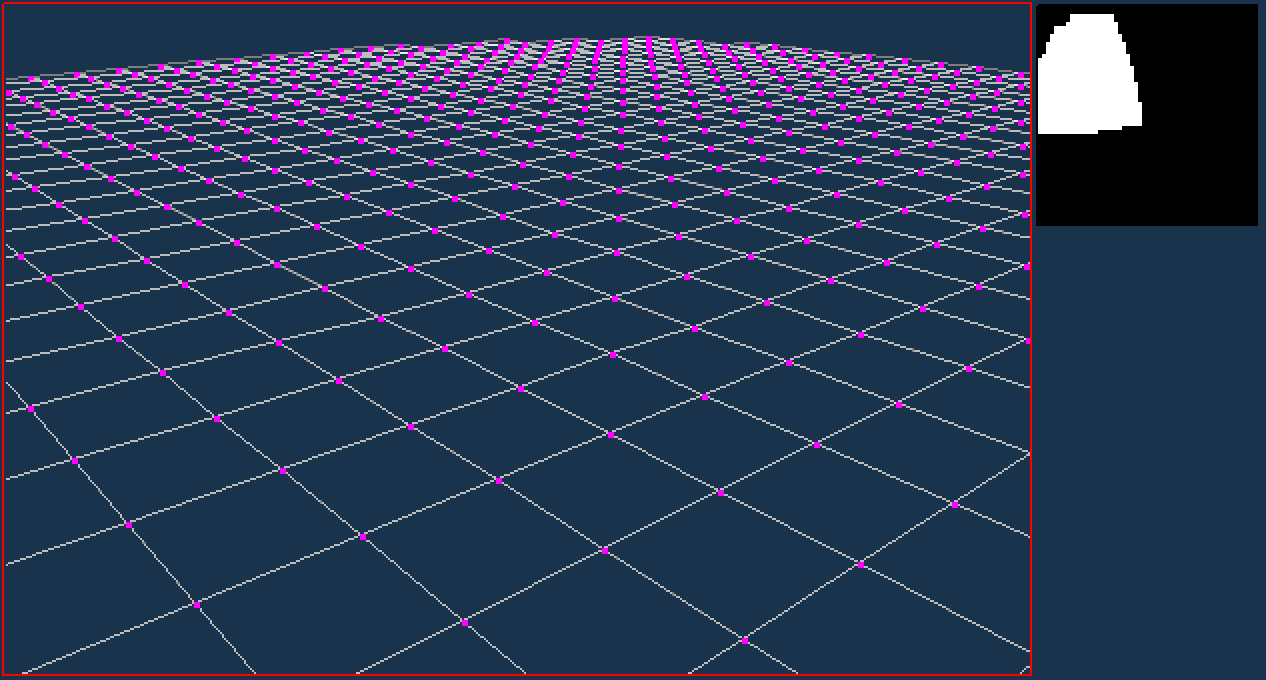
Here is a 2D depiction of the original algorithm:
You'll notice that depending on the angle there are tiles missing on the leading or trailing edge. This is because the original frustum only takes into account the south-west corner of a tile.
In our 2D example we are just testing if the point is within the triangle.
In 3D the point would be projected onto the screen and then tested against the viewport bounds.
It wasn't uncommon in 317 to see things inexplicably disappearing on the edges of the screen. This can be one of those reasons.
Fortunately it’s an easy fix, we just have to include all corners instead of just the one. This improves the accuracy of frustum culling within our engine, but we’re not done yet.
The actual LUT is nowhere near as granular as this simulation. Internally they are indexed by [pitch][yaw][x][z] where pitch and yaw are intervals [0, 7] and [0, 31] respectively. This means we end up getting a noticeable jump in our frustum.
Below are screenshots to visualize the way the frustum LUT jumps based on the angle. Between ~188° and 180° it remains the same, and then jumps again after 180°.
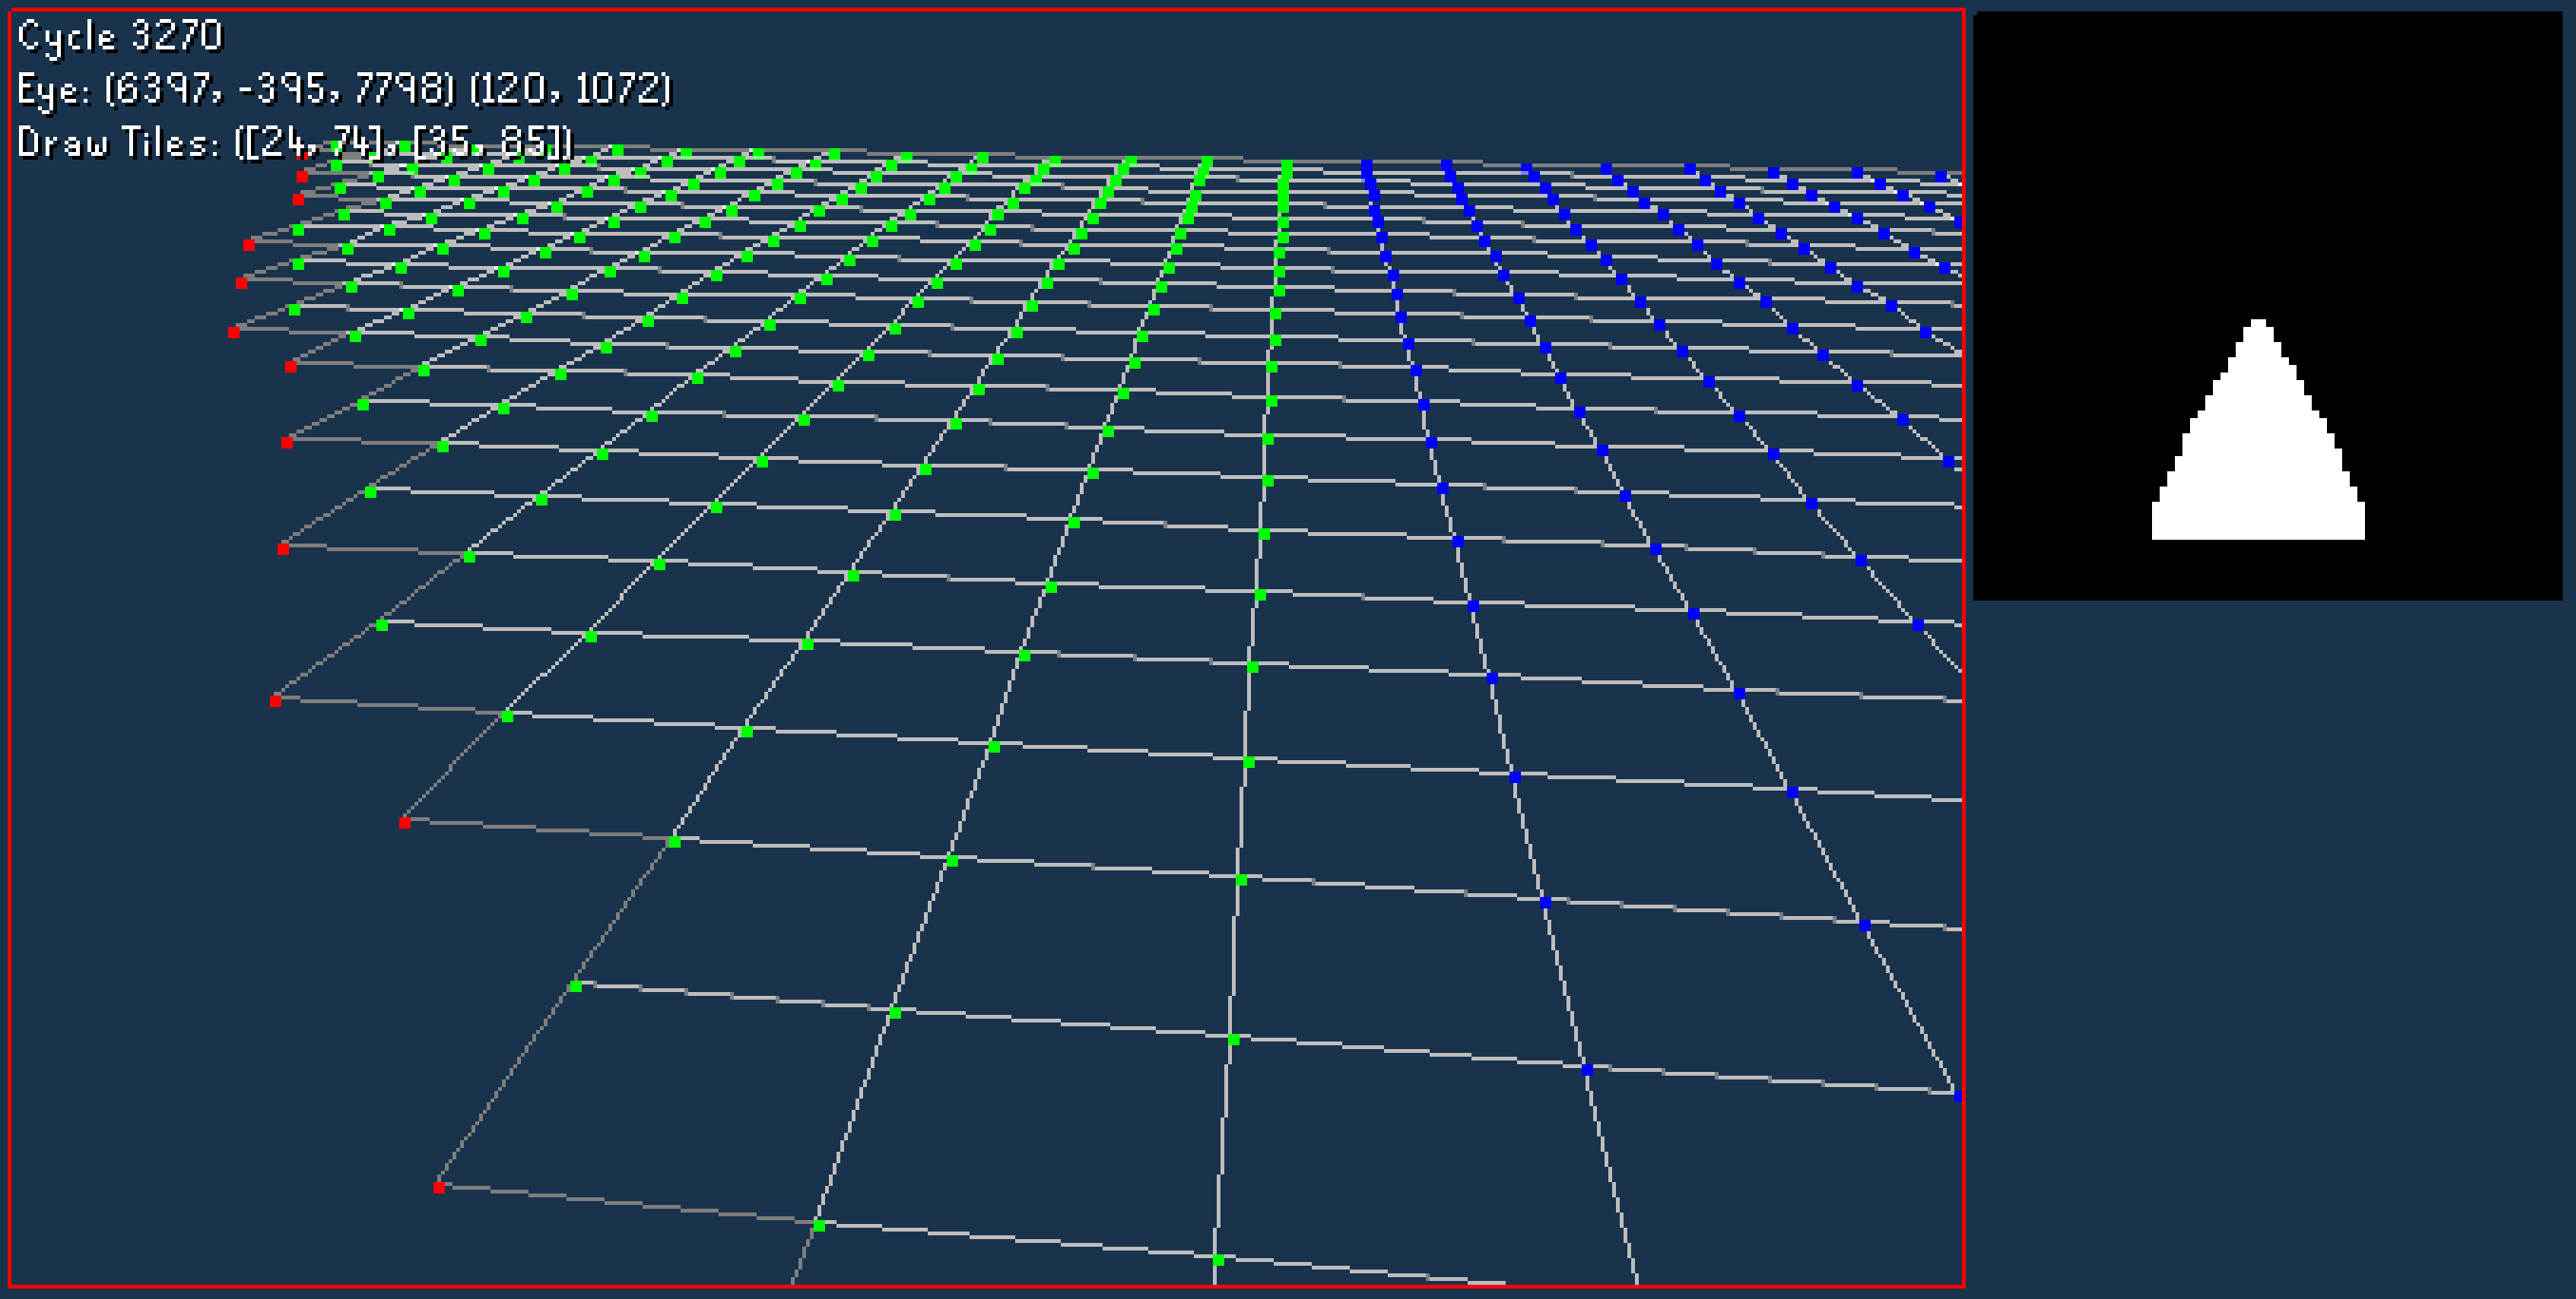 ~188°
~188°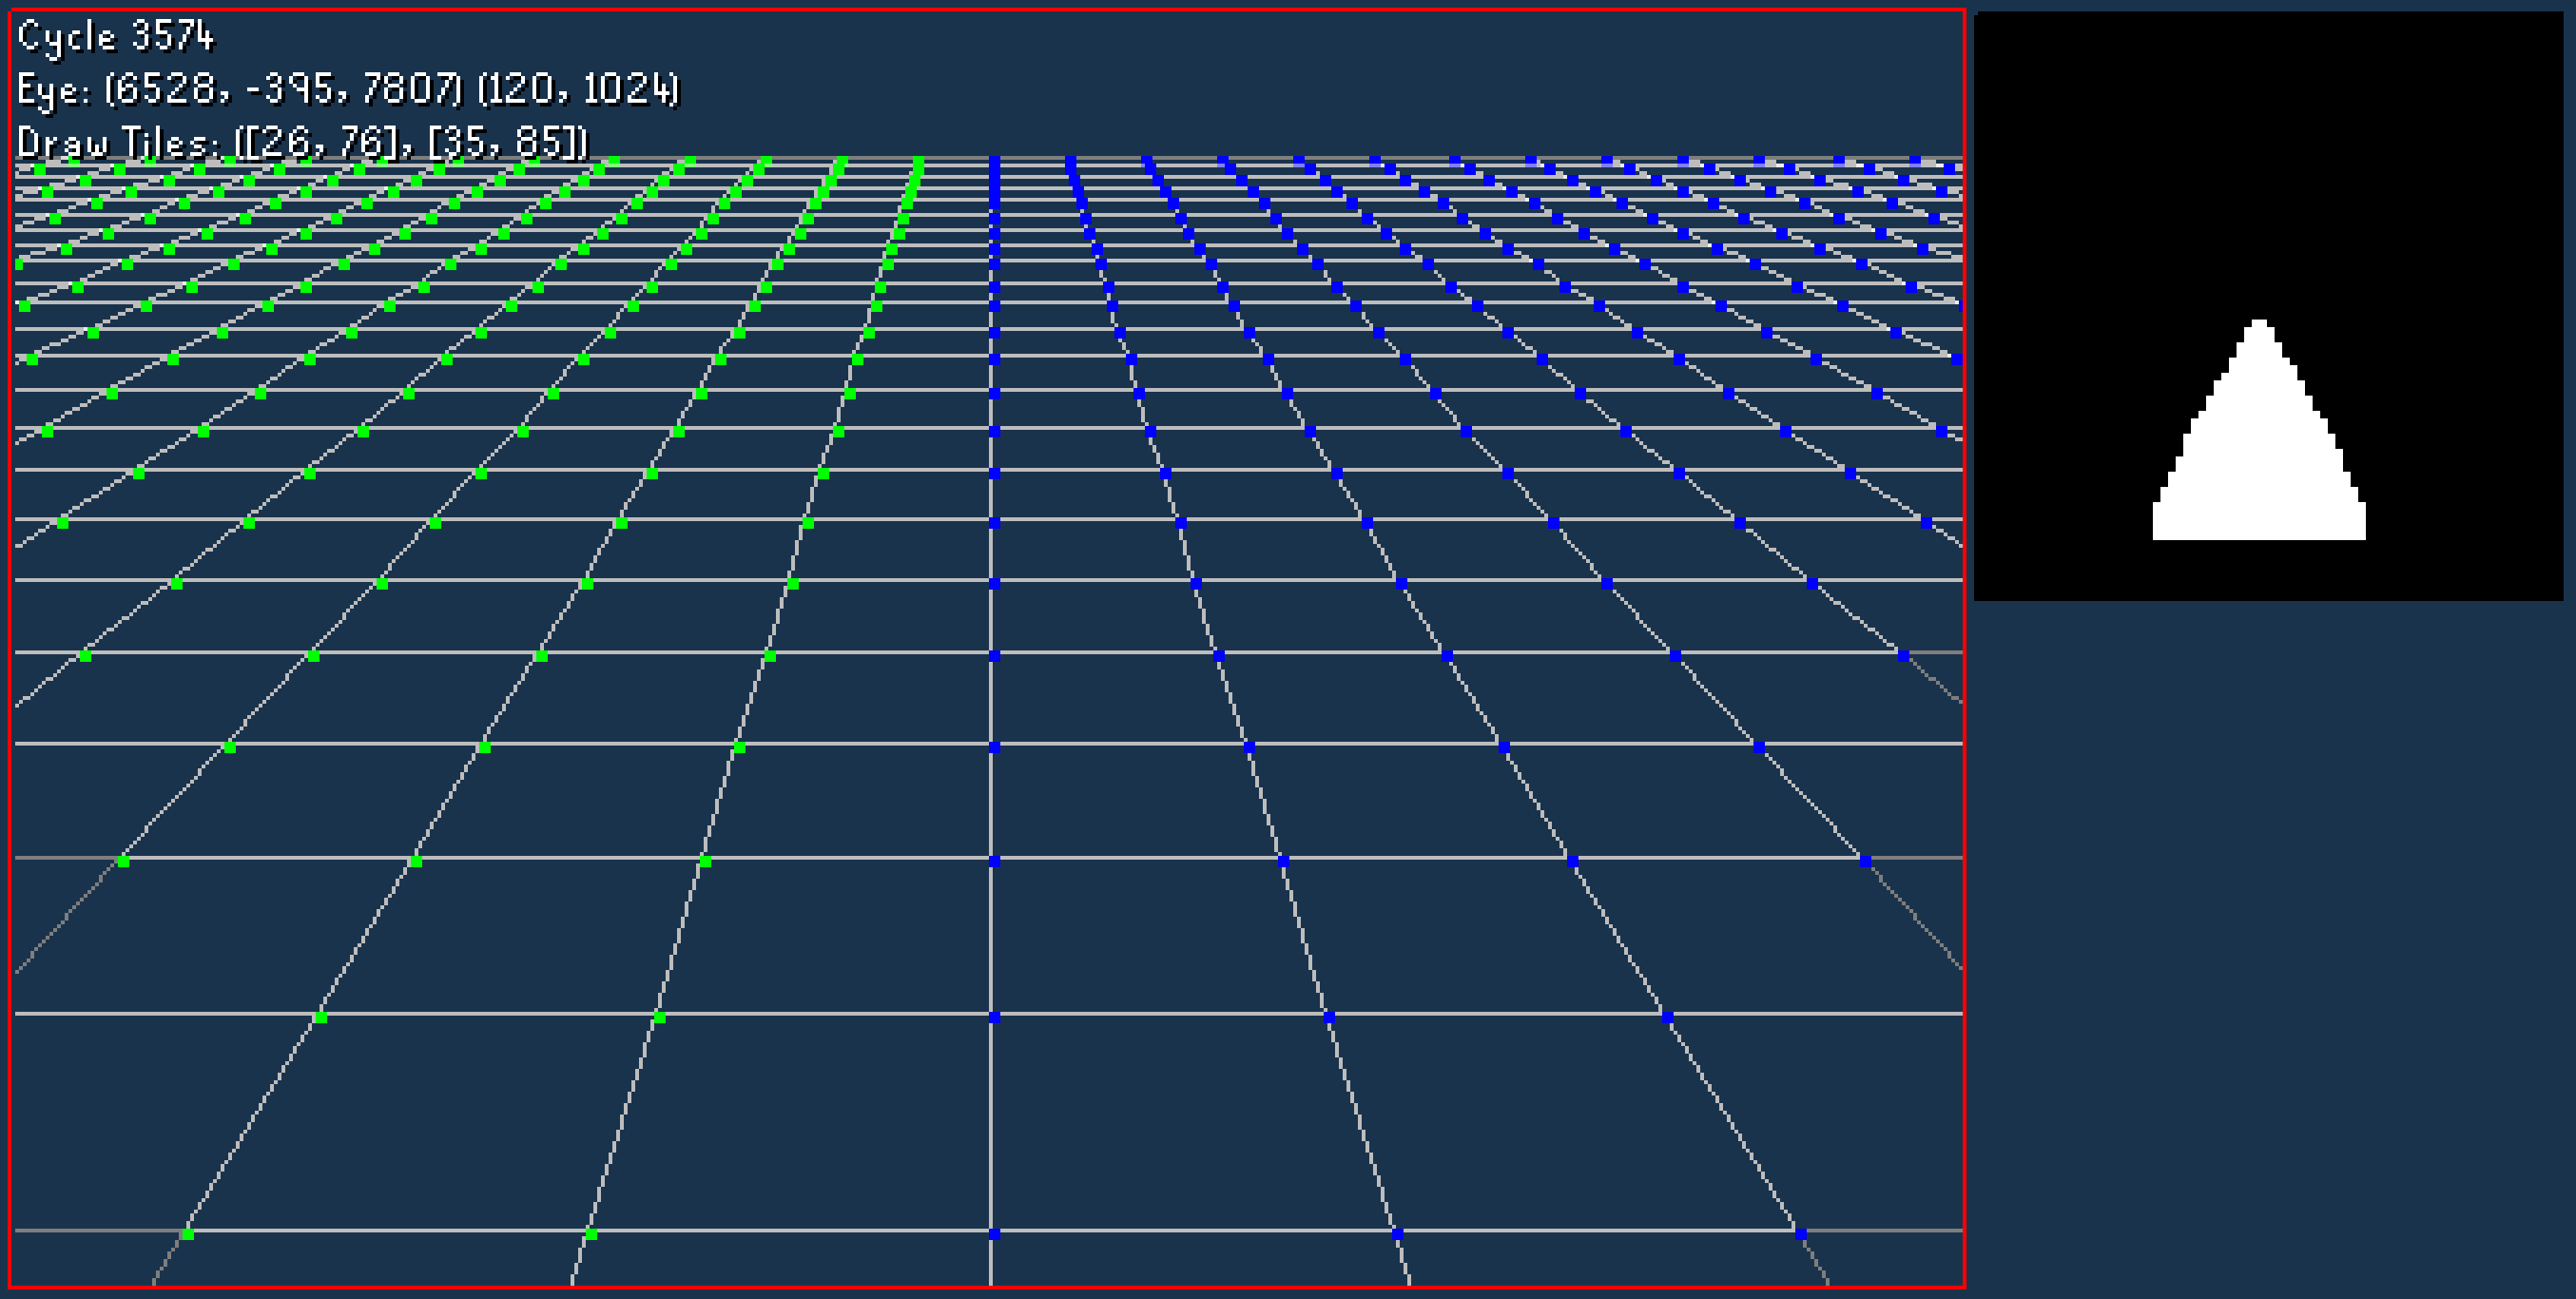 180°
180°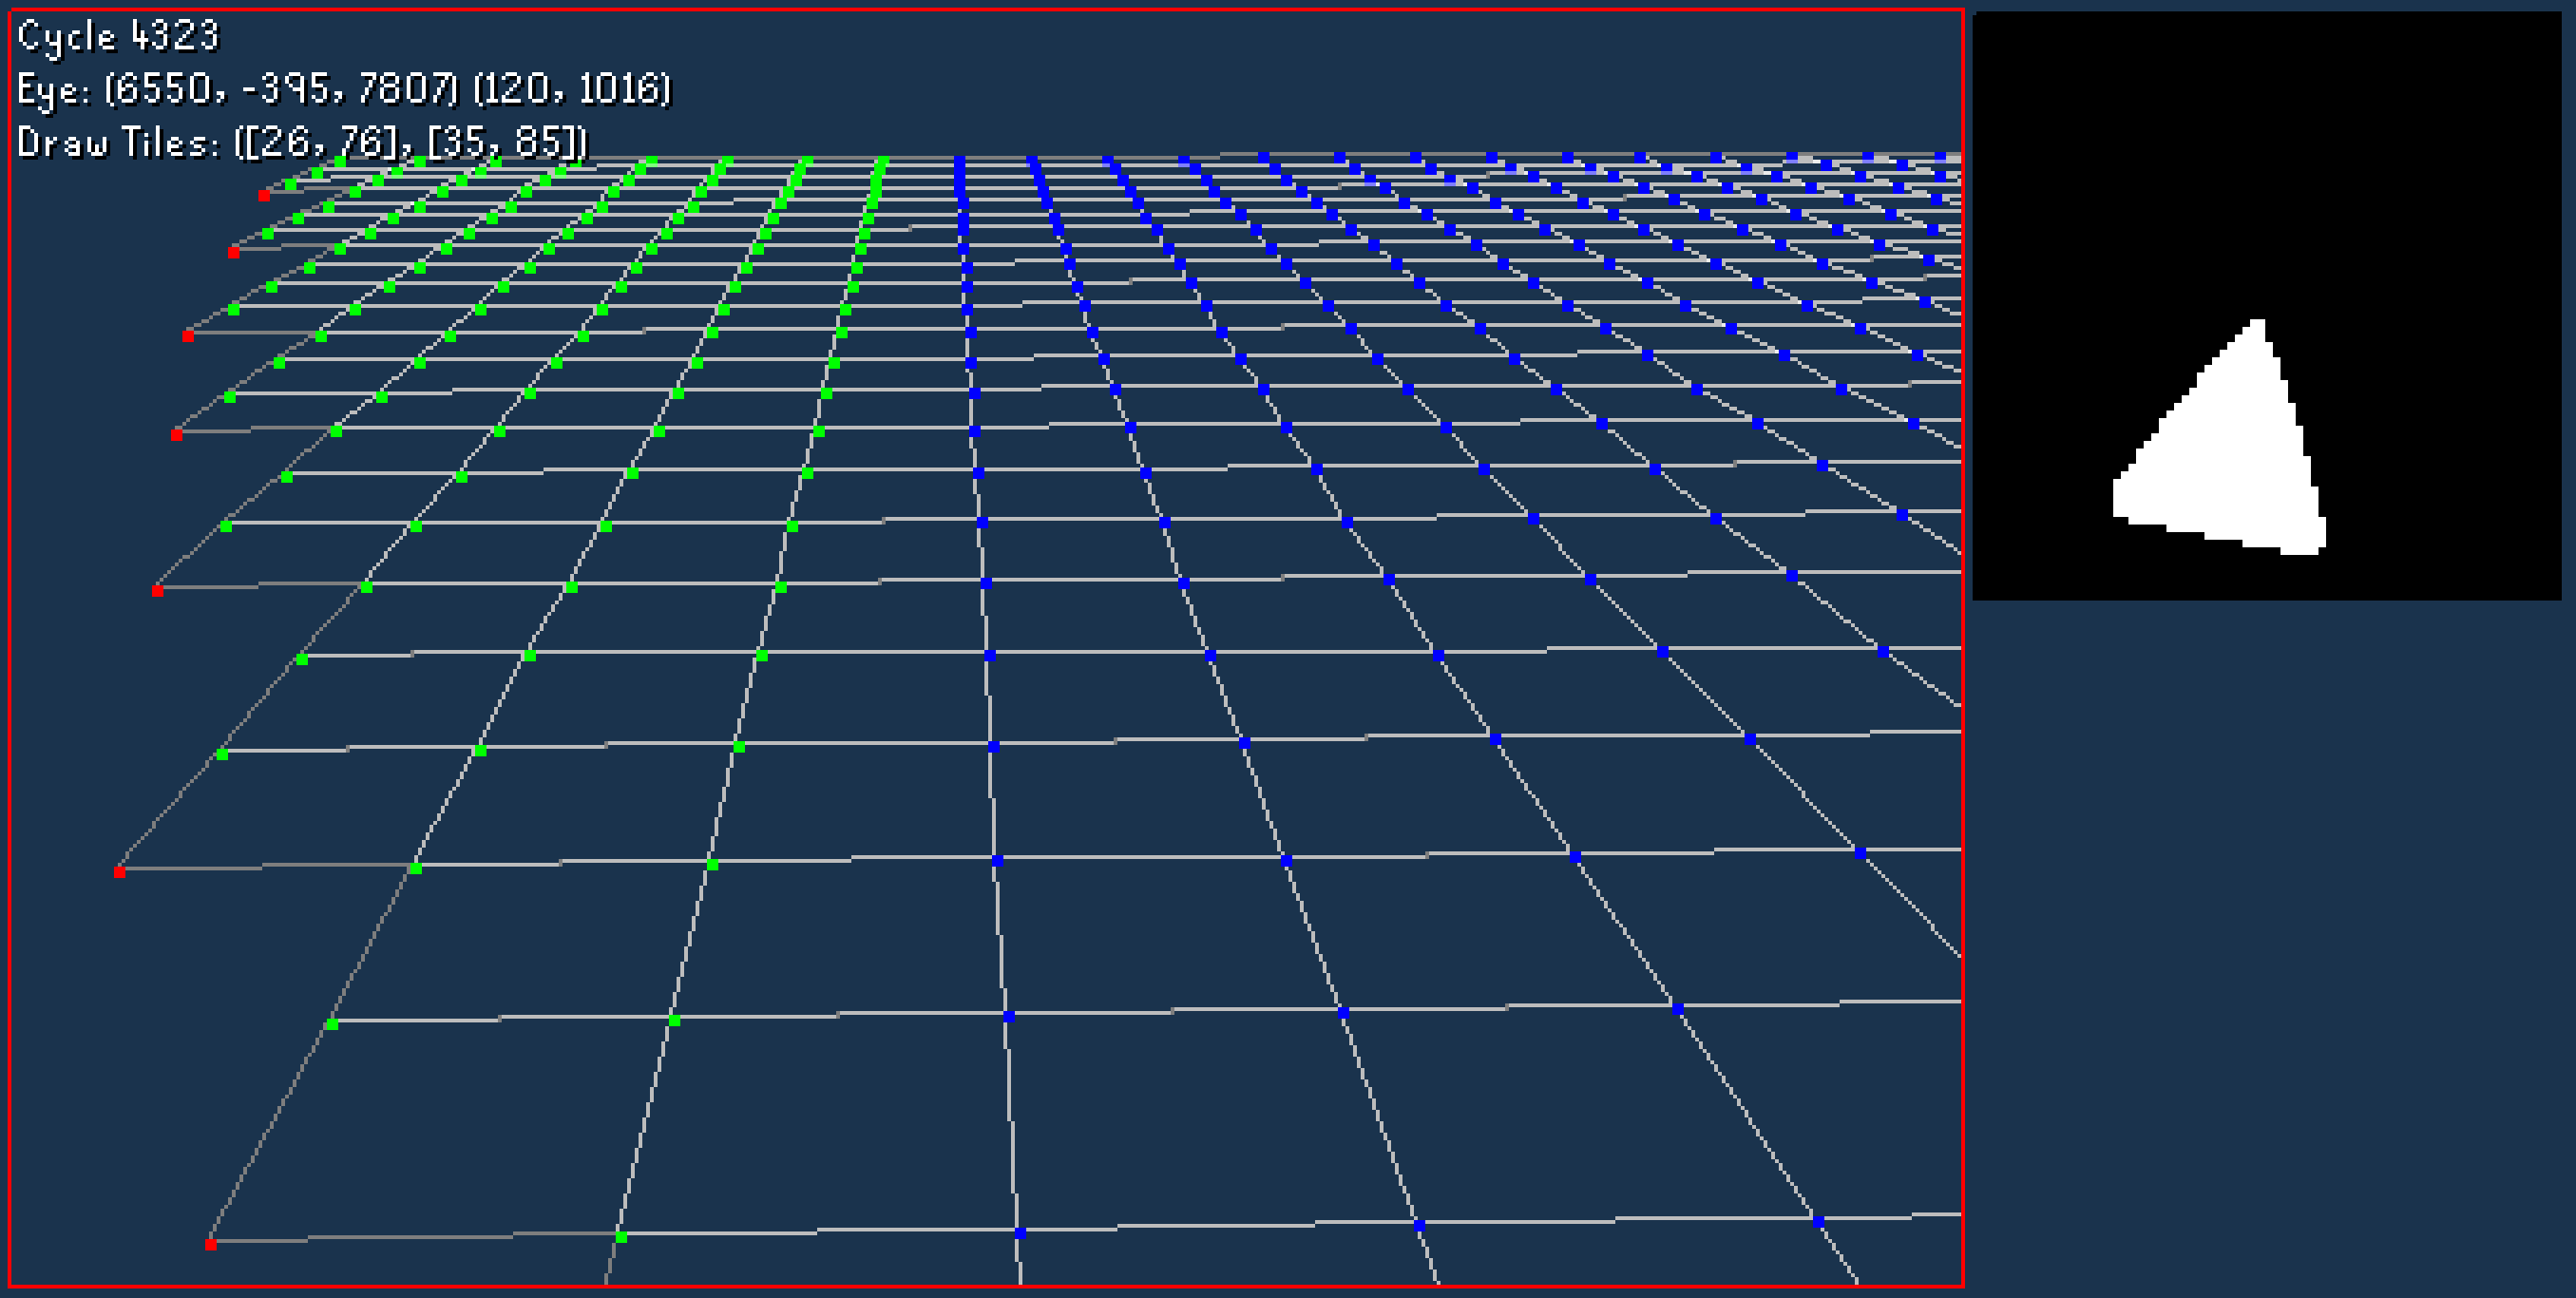 ~178°
~178°The original solution tries to supplement this by extending the edges of the visible tiles by 1. I think we can do something better, but first I’d like to do some more visualizing.
Here we can see what’s going wrong. Essentially we’re only accounting for what’s visible at each exact angle, causing the leading angles before the next index to be incorrectly culled.
We can reduce this problem by offsetting the frustum angle by one half of a segment. This is effectively the same as rounding the index to the nearest neighbor, as opposed to flooring it.
const segments = 16
const segment_size = (2*PI) / segments

frustum_index = floor(angle + segment_size/2)
While this doesn’t completely solve the problem, it splits it in half and makes both the leading and trailing edges share it.
There are two solutions I could identify:
Compenstate by stitching adjacent pitch/yaw indices together.
- Lower segment counts make the resulting frustum look jagged.
- Simple to implement
- Basically free computationally.
Perform a pass which splits each segment into N subdivisions and consolidates the visible tiles for each subdivision back into the original segment.
- This may be the optimal solution if the frustum LUT is using a lower partition count (e.g. 8).
- Produces a more rounded shaped frustum as opposed to stitching.
- More computationally expensive. (milliseconds?)
Naturally, I went with the easiest option first.
💡 If you're curious what option 2 looks like:
In hindsight I could have made the other previews check tile distance first to get a proper curve to the end of the frustum. I did so with the second option with produces much nicer results.
With that out of the way, we can start testing our scene graph.
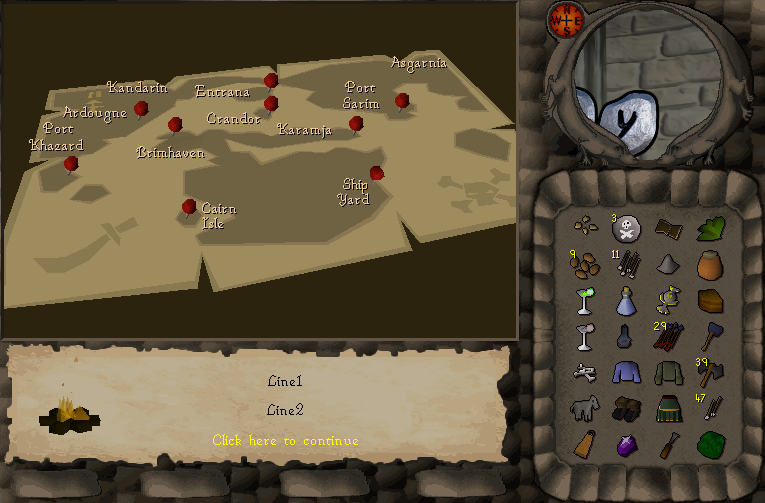
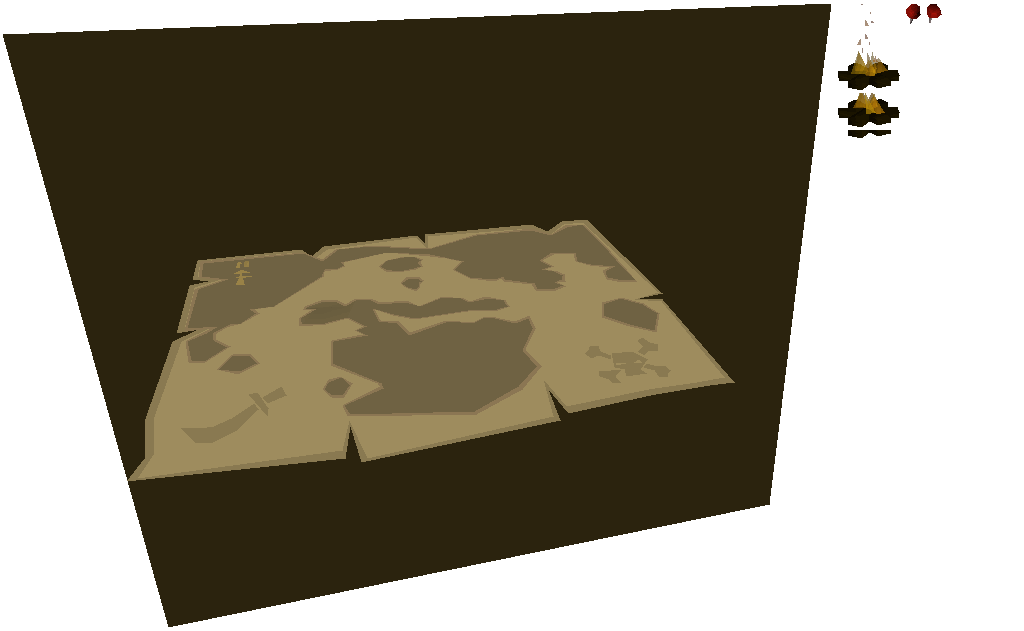
Scene
Tiles
The scene is made up of multiple layers of tiles which can be thought of as 2D representations of the 3D world. I’ve already stubbed out the entire scene graph from the original client, so let’s see how the bottom level looks.
Nice. Squares are cool but terrain is even better.
Note: I'm rasterizing the scene on the CPU for now.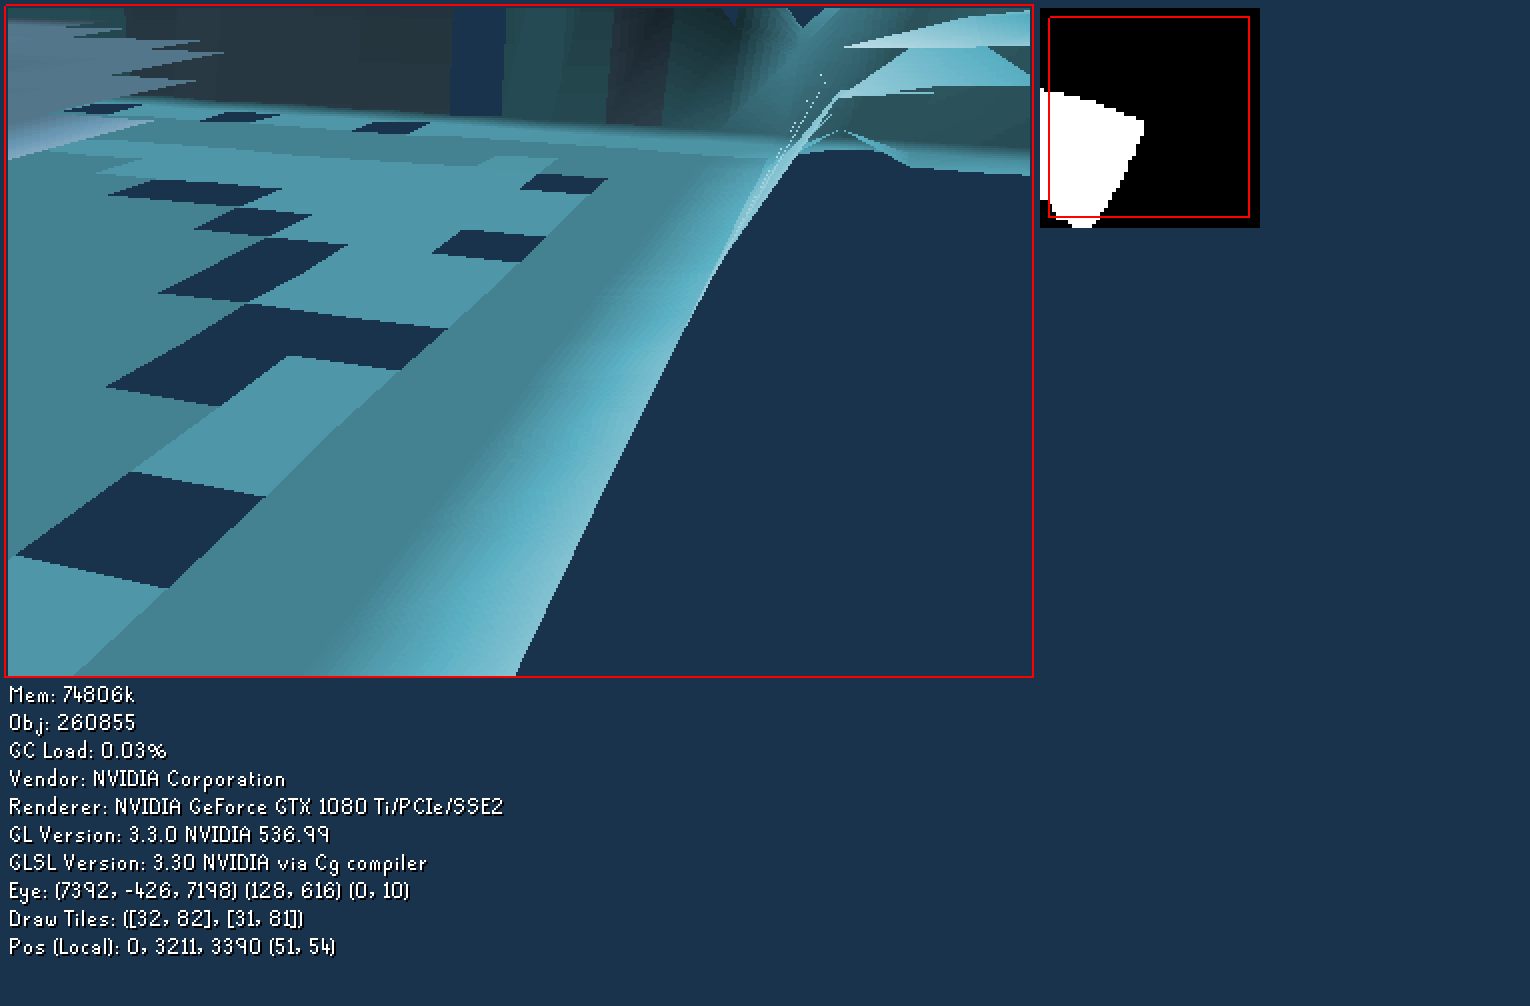
Oops I messed something up while decoding terrain. Let’s solve that.
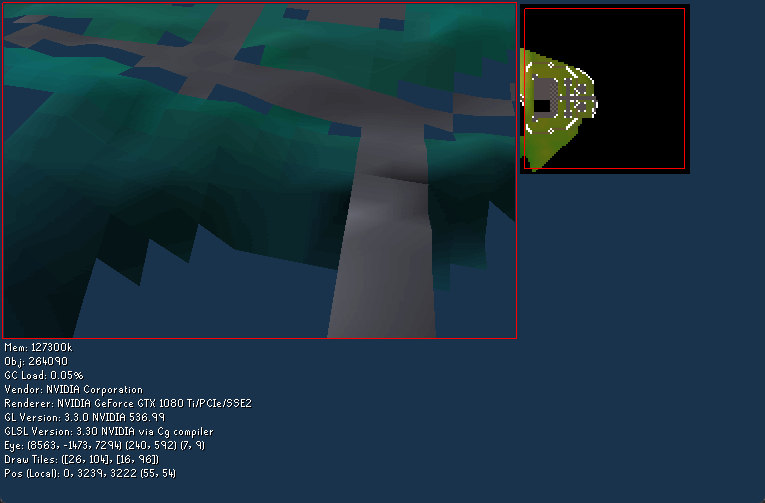
That’s… better. Except the colors aren’t right. I’m gonna ignore that issue for now. Let’s get a better birds eye view of our scene.
Looks like there’s still some problems.
The edges of the scene are being populated with the incorrect tile data.
- After some debugging, I realized I had some coordinates swapped around.
The colors of the scene are still…swampy.
- This was due to the software rasterizer using RGB and the GPU expecting BGR. A simple swap in the shader fixes this!
There are missing floors and water.
- This was due to the textured overlays draw function only being a stub!
This is the result after knocking problem 2 and 3 out:
I fixed problem 1 but forgot to take a screenshot. Anyways…
Objects
We’ve got our representation of each level set up, now we can start populating our scene with objects (aka centrepieces). There’s multiple object “shapes” to include in no particular order:
- Centrepiece
- These are your typical objects.
- Ground Decoration
- Things like grass, twigs, flowers…
- Wall
- Typical walls, gates, fences, doors…
- Wall Decoration
- Torches, murder holes, paintings…
- Roof
- Essentially just centrepieces that contribute to occluders.
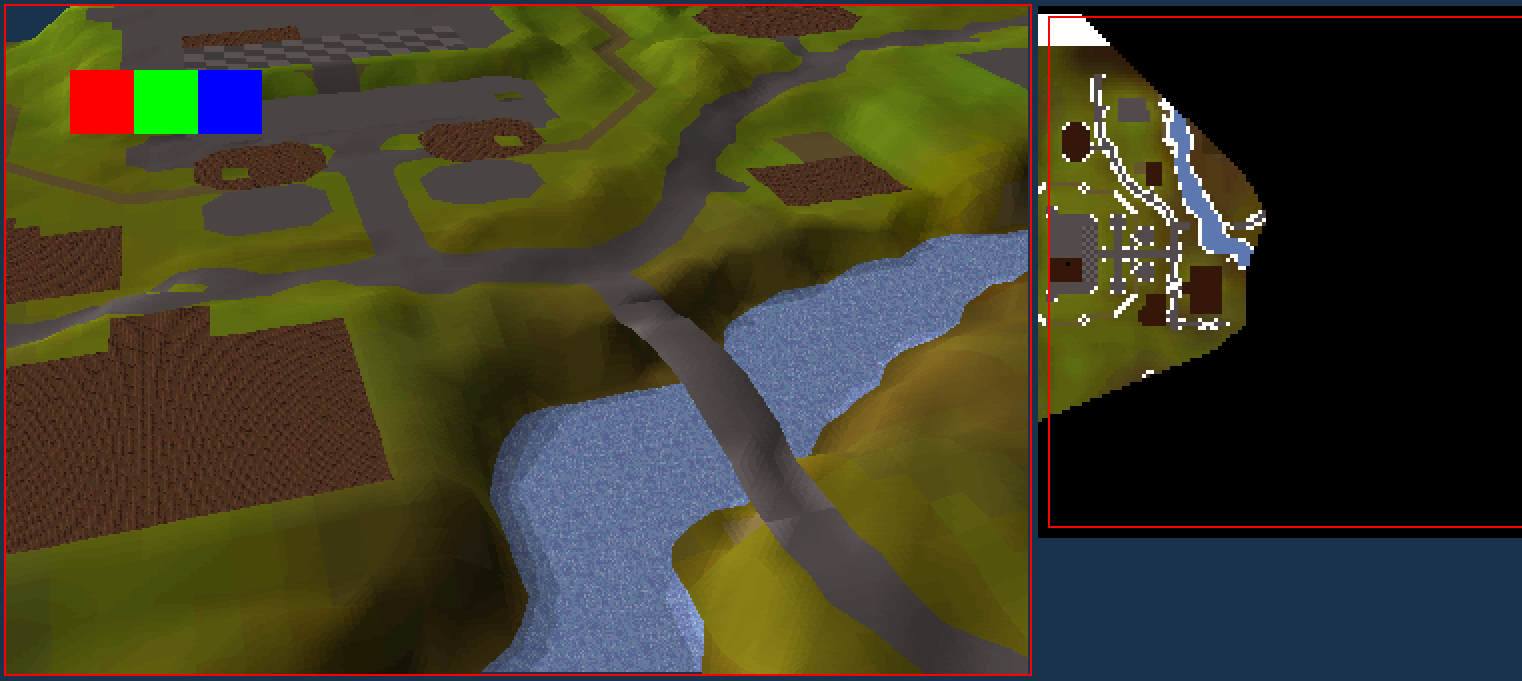
Let’s knock out centrepieces!
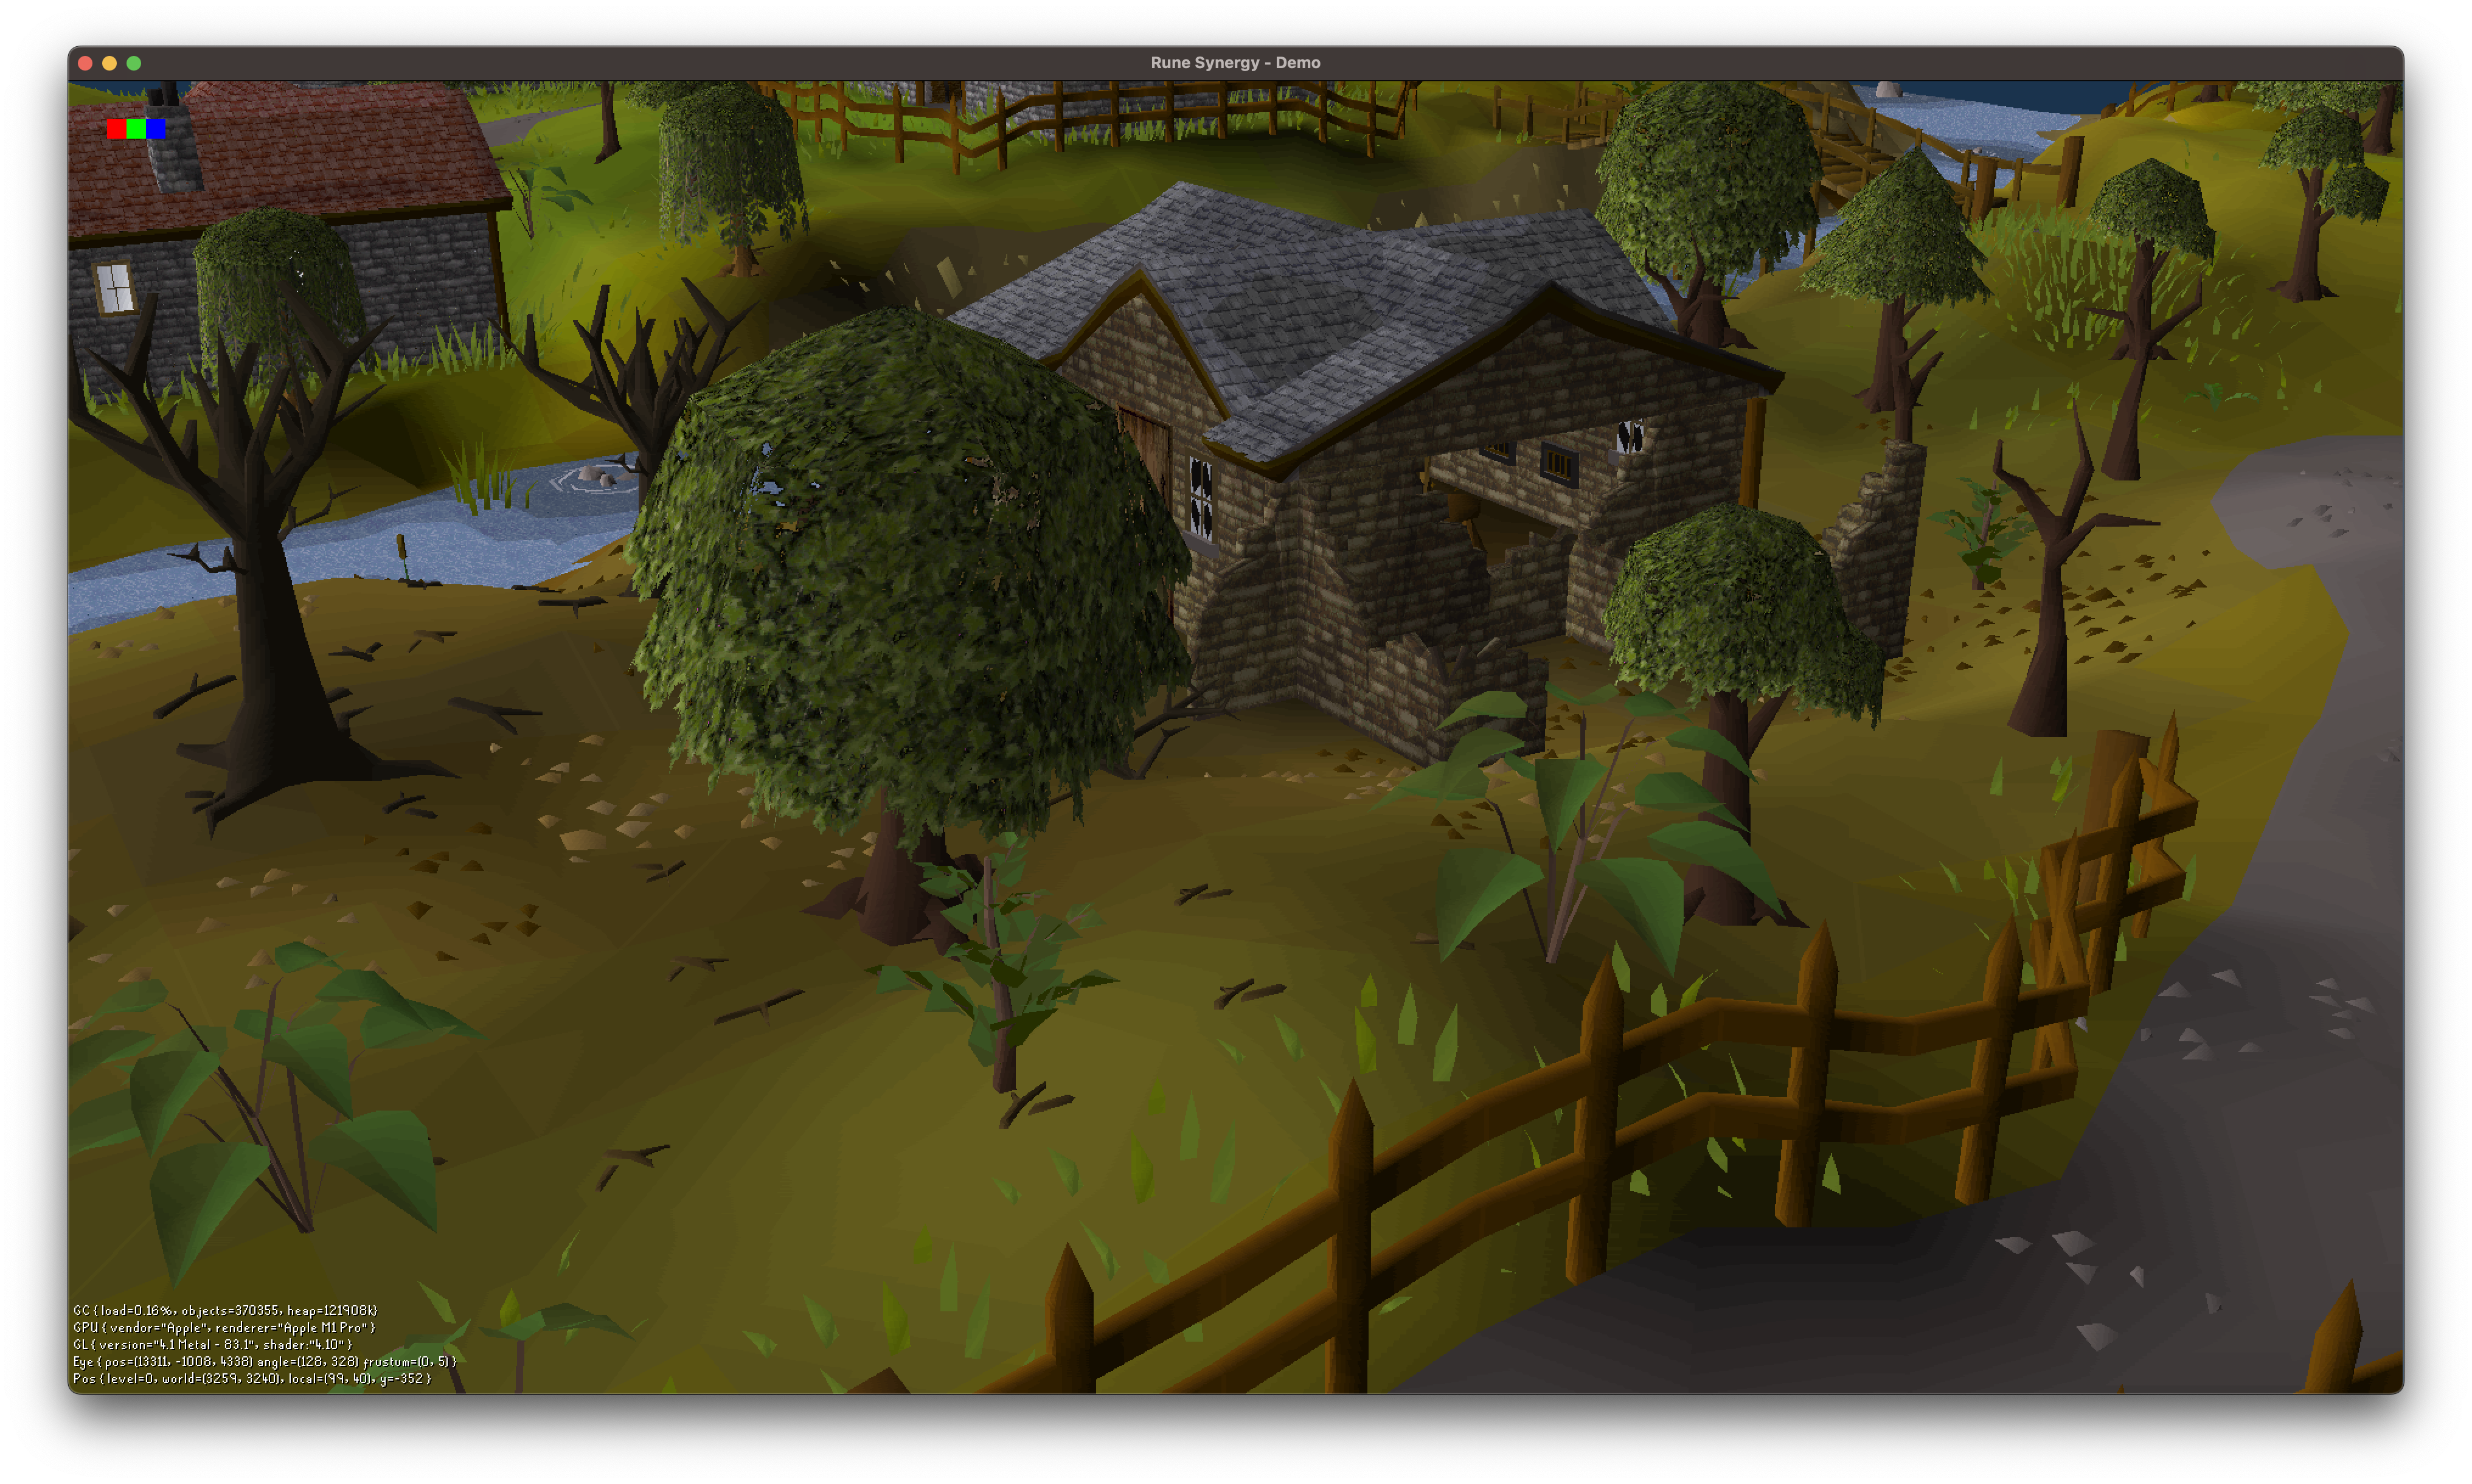
Perfect, they look how they should. From now on I’ll have a larger viewport for your viewing pleasure. I also reduced the frustum back to stock.
Note: You may notice holes in the stone walls. This was due to accidentally causing some pixels to be transparent.However, they’re still a bit funky looking. There’s a bunch of pure black faces and the textures are missing lighting! Certain objects will skip calculating their lighting if they’re expecting to possibly share normals within the scene, causing those pure blacks and pure brights. Let’s get that fixed.
After much tweaking and bug fixes, we’ve finally got a working scene!
Entities
But it still needs entities! NPCs! Players! It seemed most natural to start with players since the camera will be orbiting my own local player, so I did exactly that.
!! WARNING: AUDIO !!
Closing remarks

Overall exciting stuff. I’m happy with the progress made so far and don’t see it stopping anytime soon. There is still so much to do.
In a somewhat particular order:
- Inputs (UI, moving, etc)
- Other Players
- NPCs
- Ground Items
- Projectiles
- SpotAnims
- Temporary Objects
- Occluders?
However, It’s that part of the year where the holidays and sickness take over. I’ve been sick twice in the last two months now! As I’m writing this I’m suffering from the sickness. Expect more rapid updates once the holidays are over and I recover! Until then, join us in the discord for a good time!